How to get started with Skapp? A Step-by-Step Setup Guide

TL;DR
Getting started with Skapp takes just a few minutes. Create your account, set up your organization details, and complete the Quick Setup to invite employees, define teams, configure job families, and set up leave policies. Once these steps are complete, your workspace is ready and you can begin managing projects, employees, time off, and other business operations from one platform.
Setting up Skapp is designed to be quick and straightforward. Within just a few minutes, you can create your workspace, invite your team, and configure the essentials needed to run your organization smoothly.
This guide walks you through the complete onboarding process.
Step 1: Create Your Skapp Account
Getting started begins with creating your account. You can sign up using your Google or Microsoft account, or create an account with your email. Simply choose your preferred method on the Sign Up page and follow the prompts.
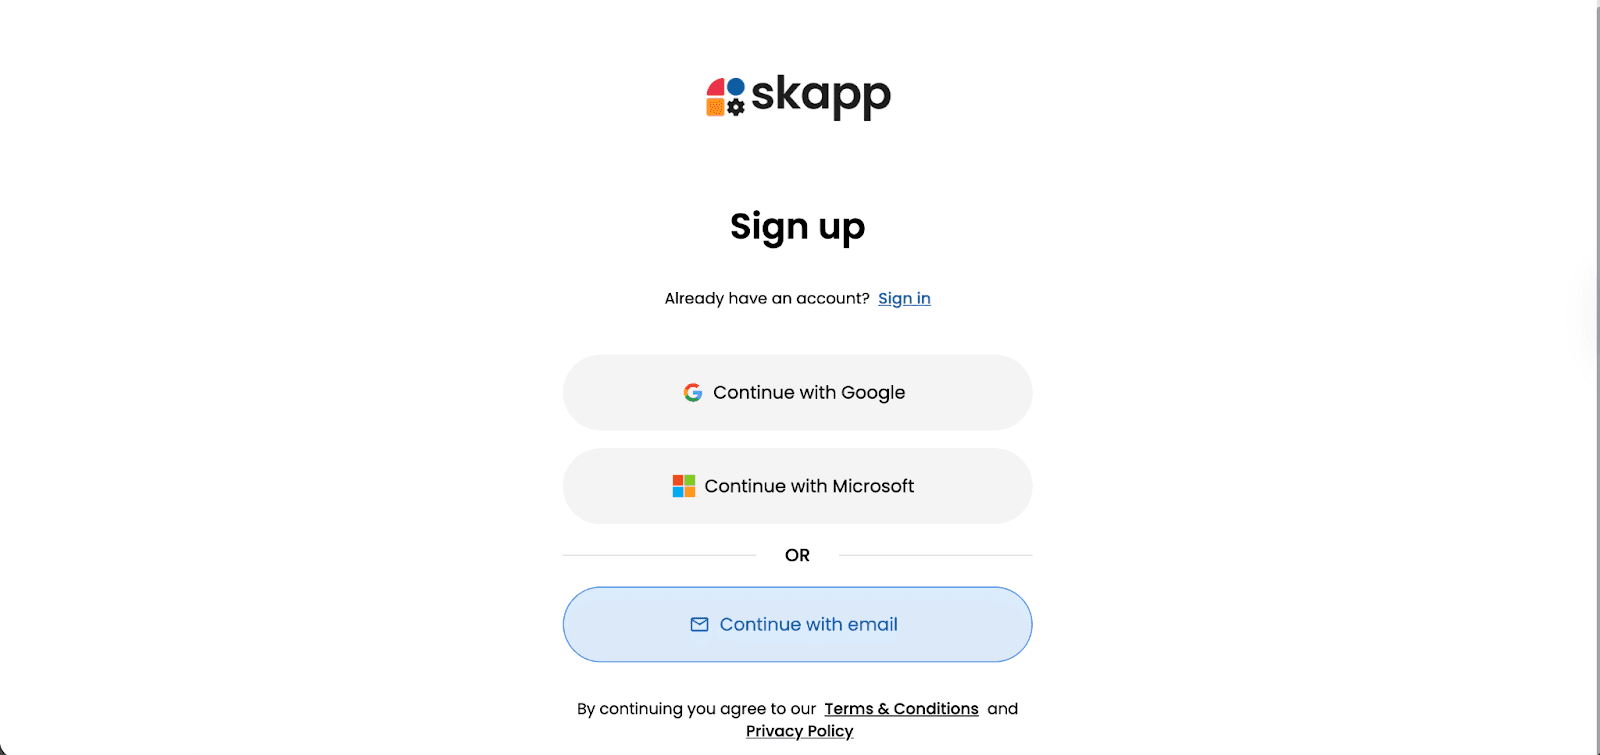
If you already have an account, you can sign in directly.
Step 2: Set Up Your Organization
After signing up, you’ll be asked to enter your organization details. This ensures your workspace is configured correctly from the beginning.
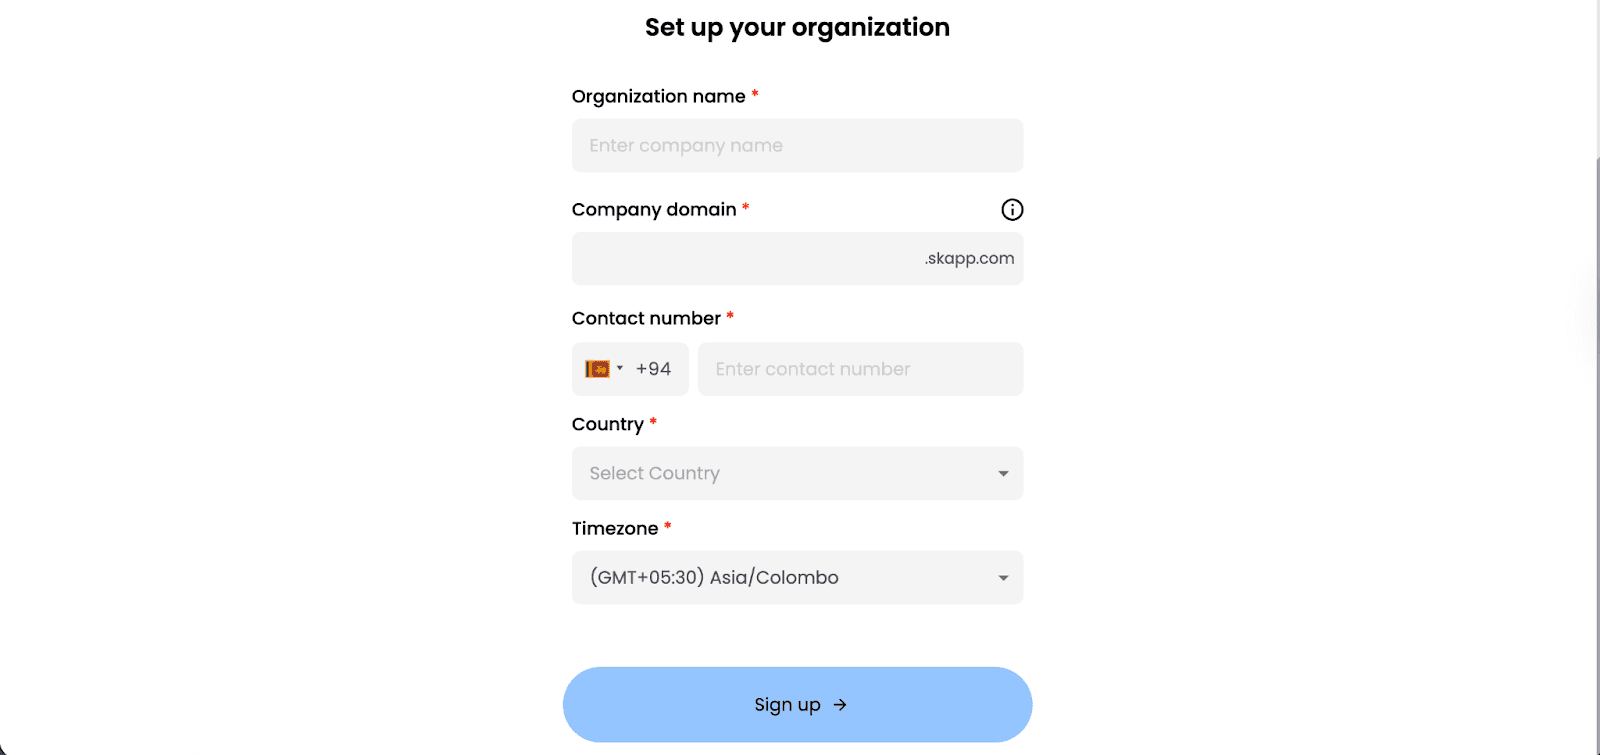
You’ll need to provide:
Organization name
Company domain
Contact number
Country
Timezone
These settings help tailor your workspace to your location and business operations.
Once completed, click Sign Up to proceed.
Step 3: Complete the Quick Setup
After entering your organization details, Skapp will guide you through a Quick Setup panel. This helps you configure the foundational elements of your workspace in one place.
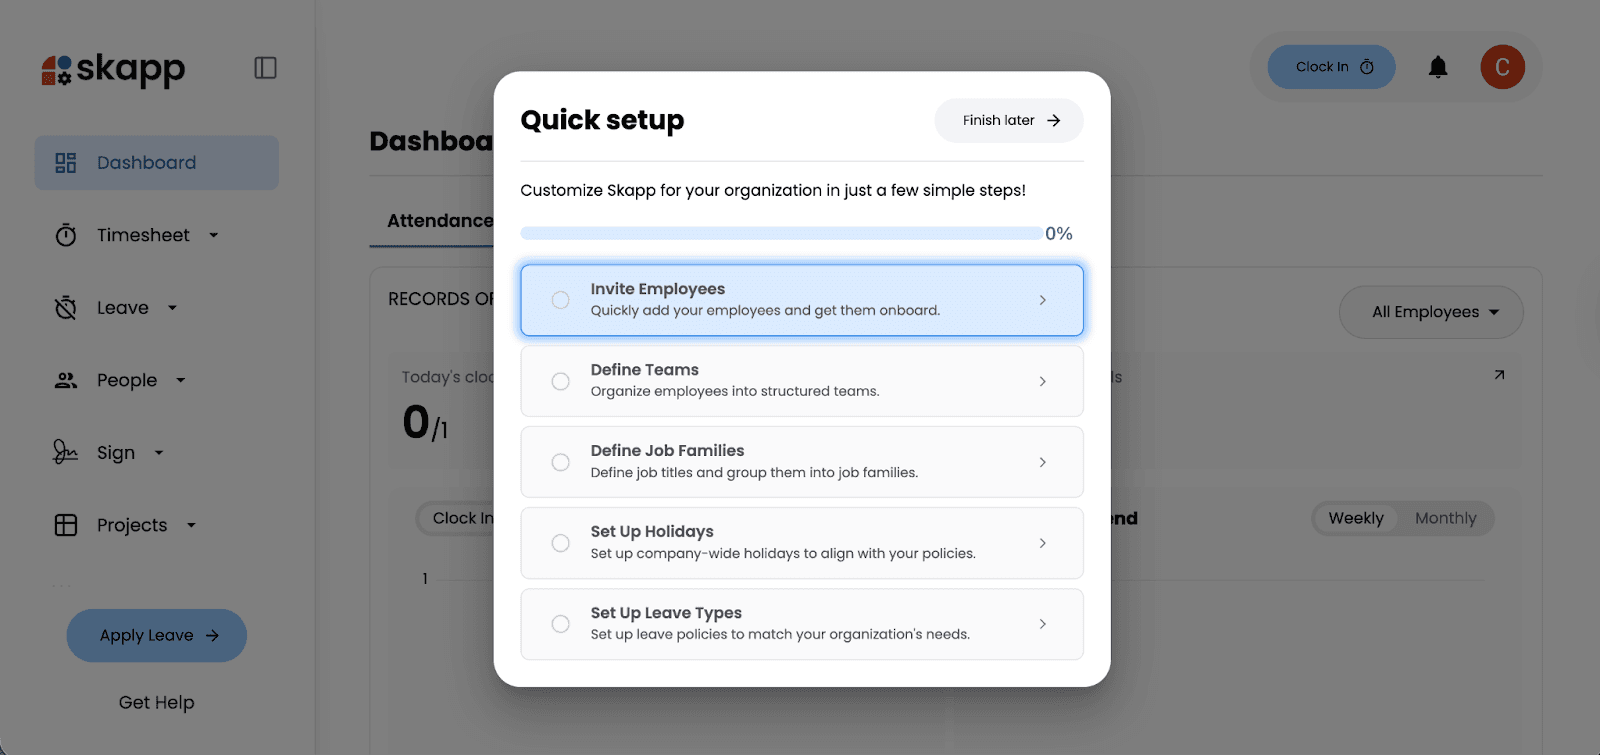
The Quick Setup includes:
Invite Employees
Define Teams
Define Job Families
Set Up Holidays
Set Up Leave Types
These foundational steps ensure your workspace reflects how your organization operates.
Rather than covering each step in detail here, we’ve created dedicated walkthroughs for each module to help you configure them properly.
Continue with Detailed Module Guides
For a complete guide on:
Inviting employees
Creating and managing teams
Defining job families
Managing employee profiles
Visit the People Module Walkthrough.
For step-by-step instructions on:
Setting up company holidays
Creating leave types
Configuring leave policies
Refer to the Time Off Module Walkthrough.
These guides provide a deeper look at each feature and help you tailor them to your organization’s needs.
You’re Ready to Explore
Once your organization is set up and your Quick Setup steps are complete, your Skapp workspace is ready to go. From here, you can begin exploring Skapp’s modules and start managing your operations in one connected platform.
How do I get started with Skapp?
To get started with Skapp, create an account using your Google, Microsoft, or email login. After signing up, enter your organization details and complete the Quick Setup process, which includes inviting employees, defining teams, and configuring leave policies. Once these steps are complete, your workspace is ready to use.
How long does it take to set up Skapp?
Most organizations can complete the initial Skapp setup in just a few minutes. Creating your account and entering organization details takes less than a minute, while the Quick Setup helps configure core workspace settings quickly.
What information is required when creating a Skapp workspace?
When creating your Skapp workspace, you will need to provide your organization name, company domain, contact number, country, and timezone. These details help configure your workspace settings correctly.
What should I do after completing the Skapp setup?
After completing the setup, you can start exploring Skapp’s modules and begin configuring workflows for your organization. Dedicated guides for the People module and Time-Off module can help you customize employee management and leave policies in more detail.